Dr MACARONIS JACKET:
1.) I began by choosing the pattern above and adjusting it to my models measurements. Here you can see each pattern piece once cut out.
2.) I then cut out the pattern pieces for my toile and sewed them together, where I then asked my model for a fitting. Lighting isn't great, but I drew a line along the front of the jacket to make it more curved much like 18th century jackets.
3.) Although I want the jacket to be fitted, I need to allow room for the shirt and waistcoat so will have a second fitting before I cut in the real fabric.
4.) Now with the garments on underneath, I checked the fit of the jacket again. I decided to adjust the shoulder seem slightly to fit better to the line of the models shoulder. With these adjustments I was ready to begin making out of my chosen fabric.
5.) I took apart the toile and made the adjustments. I then cut my fabric and a backing in calico to strengthen the fabric. I needed this calico backing as I am trying to make this costume on a tight budget and therefore the fabric I have chosen is thinner than I would have liked.
6.) I wanted to add detailing to the cheaper fabric in order to make it look more 18th century. I therefore bought a set of transfer dyes and began drawing out a pattern I liked.
7.) Before printing straight onto the real fabric, I tested out the colours on a small piece of the fabric.
8.) I then painted my pattern and added lots of layers with less water as I found this weakened the finished colour.
9.) This is the heat press I used for the process.
10.) Here is my cut out fabric piece with the pattern printed on it using the heat press. If I'm honest, I'm not happy with the outcome. I think the print looks unprofessional and although trying to do the costume on a budget, I think with this print, it is quite clear. Before I waste hours creating something I'm not completely happy with, I have decided to buy a different fabric and not use the heat press.
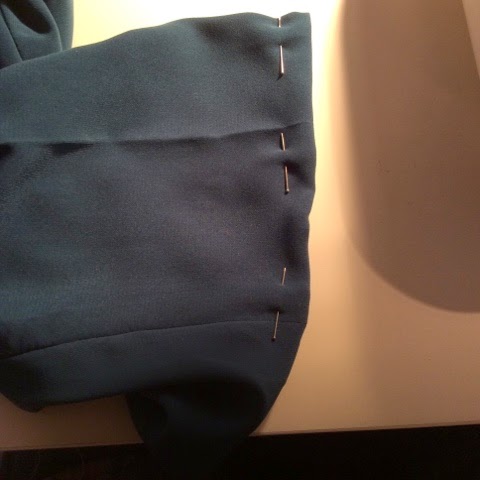
11.) I chose a brighter pink, in a rich satin. I'm much happier with this choice of fabric and here you can see my basting stitch to secure the calico backing and the canvas stitched along the front panel.
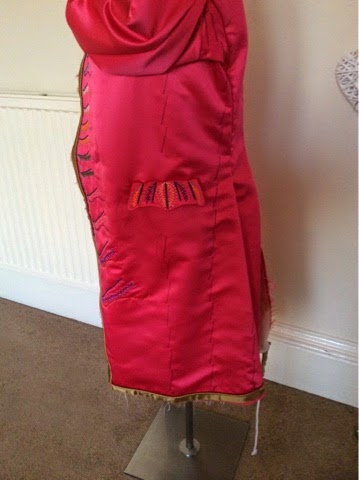
12.) As I am no longer using the heat press, I wanted to add some detailing along the curve at the front of the jacket. I decided to hand embroider my design which is extremely time consuming, however I think the effect will be worth it. I have timed myself throughout this whole process which can be seen at the end of this blog.
13.) I added different stitches to make the pattern more interesting. As I am now only making one costume, I have decided to integrate the two eras together into one costume. I therefore went for an 80s inspired embroidery pattern opposed to a traditional 18th century print.
14.) I have altered the colours every two sets which made the process more stimulating! I also decided to make the spacing larger as I progressed to the bottom of the jacket to mirror the curve at the front.
15.) Although the jacket is to big for me I decided to put the jacket together which gave me a break from embroidering. I'm happy with how the embroidery has progressed.
16.) Back view.
17a.) As I knew I would be making lots of pom-poms which is very time consuming, I bought this cheap device that makes the process very quick.
17b.) First of all, I open out each side of the pom-pom maker.
17c.) I then wrap my chosen colour of wool around each side.
17d.) I then close the device.
17e.) Cut along the middle.
17f.) Secure the wool with a single strand of wool.
17g.) Remove the device and neaten the pom-pom with scissors.
17h.) Then make lots in different colours!
18.) Before I added the piping and cut the sleeves, I checked the fit of the jacket. I am happy with the shape and much happier with the change of fabric! As you can see all the garments together (minus the trousers) I don't like the pink of the shirt with the pink of the jacket.
19.) Back view. The model is also wearing the lining of the jacket. I put this on in order to check that there was still room for movement in the jacket.
20.) I wanted to check the fit of the sleeve before cutting it out of the real fabric. I want the sleeve to be more fitted, as this was an exaggeration the Macoronis did to their jackets.
21.) I was happy with the fit of the jacket and no alterations were needed. I therefore cut 5 metres of gold silk on the bias (concealing any joins my cutting the fabric to a point) and used the zipper foot to sew close to the piping and the. Onto the edging of the jacket.
22.) In order to continue with the embroidery on the other side of the jacket, I positioned the pom-poms to look like a flower which the Macoronis often had. However as I am integrating the two eras, I used pom-poms instead of flowers. I'm not too happy with the positioning here, so will make them more recognisable as a flower shape.
23.) This is ten finished pom-pom shape I decided on. Although sleeves have appeared in this photo, the steps for this can be seen next.
21.) I therefore re-cut the sleeve toile and checked that it fit into the jacket.
22.) I needed to iron out the sleeve seams flat so I quickly made a padded sleeve shape in order to put through the sleeve.
23.) As you can see, this made ironing the seams flat much easier.
24.) I then attached the sleeves. It's now looking like a jacket! I kept check the positioning of the sleeves to ensure that they were straight as well as the seams matched on each sleeve.
25.) I then began hand embroidering the second half of my jacket in my chosen 80s style.
26.) I didn't want to ask my model to come for a fitting just to try on the jacket without having the trousers to fit at the same time, so I just checked the sleeves on a friend that has a similar build to my model. I want the sleeves to be very tight as this was typical of the Macaronis. I'm happy with how tight the sleeves are on my friend, but his arms are slightly bigger than my models so I will wait until the next fitting before I add the cuffs so that I can alter the sleeves first.
27.) During my fitting, I left space in the shoulder for shoulder pads. The pads smooth of the sleeve seam and add a nice finish to the garments. Instead of buying shoulder pads, I made my own. First, I cut out the felt shape by positioning it and cutting it on the mannequin.
28.) The back of the shoulder pad reaches further down the back of the sleeve shape than the front of the shoulder pad (See Below).
29.) Front shape of the shoulder pad.
30.) I then cut four identical shapes. (They need pressing)
31.) I then pinned the shape to some wadding and cut out two pieces.
32.) The front part of the shoulder pad which meets the edge of the sleeve seam needs to be thicker than the rest of the shoulder pad so I added a layer of wadding to this section.
33.) I then added the felt like a sandwich!
34.) I then added a hand stitch to hold the layers together - careful not to pull too tightly or you will lose the shape and thickness of the shoulder pad. The bottom edge of the shoulder pad is then hand sewn to the edge of the sleeve head, with a slight overlap into the sleeve to create a nice curve at the top. (Only a few mm's)
35.) My research into the Macaronis suggest that the tails of their coats were much shorter than normal jackets of the 18th Century...so only do this if you're making a jacket specifically as a replica for a Macaroni! Here I shortened the back tails.
36.) I kept the front of the jacket long, and cut the jacket at an angle. The reason for this, is because I want to pin up the front of the bottom of the jacket with a button so that the lining can be seen. Therefore it needs to be longer. Without this pin up, I would have cut the jacket at less of an angle.
37.) I then added my piping to the bottom of the jacket.
MAKING SINGLE WELT POCKETS
1.) I began by cutting two rectangles of lining fabric. The width measures 2" more than the desired width of my welt pocket.
2.) I then cut a square of the jacket fabric, again measuring 2" more than the desired width of the welt pocket.
3.) It's difficult to see from this photo, but I then drew two parallel lines of the wrong side of the fabric to mark out the size of the welt pocket. I drew a little dot at the end of each line.
4.) I then drew four dots on the right side of my jacket in tailors chalk which matched the dots on the square of fabric above.
5.) I then matched all the dots up and pinned the square of fabric to the jacket (Right sides together).
6.) I then sewed along the two lines, careful not to go further than the dots. I backstitched at the dots. Precision is paramount here!
7.) I then carefully cut along the centre of the two lines, leaving 1cm uncut at each end.
8.) at the uncut part, I then cut a small triangle up to the sewn line as close to the stitched line as possible.
9.) Then I pressed the flaps open.
10.) I then pulled the square of fabric through to the inside of the jacket.
11.) I then pressed the square of fabric out on the inside of the jacket. I used spray starch to get the corners crisp.
12.) I then lifted the bottom of the square up and pressed.
13.) I then pulled the top of it down and pressed so that the fold of the fabric reached the top of the open rectangle.
14.) This is what the welt pocket looks like from the outside at the moment.
15.) I then went back to the inside of the jacket and sewed down the small triangles to the folded piece of fabric a close to the edge as possible.
16.) I then sewed the rectangle of lining fabric to the top of the square of jacket fabric, right sides together. When pulled down, this forms the facing.
17.) I then sewed the bottom of the lining fabric to the bottom of the square of jacket fabric, right sides together.
18.) Once pulled down, this forms the inside of the pocket.
19.) I then pulled the pocket down into place and pressed it flat.
20.) I then sewed the sides of the pockets together.
21.) The pocket is finished!
22.) You can see the lining on the inside with the facing covering it from initial view. I will then add embroidered flaps above my welt pockets which will hide then, but its great to practise!
DECORATIVE POCKET FLAPS
1.) I started by cutting my desired shape four times, 1" wider than my welt pockets in order to allow for seam allowance.
2.) I then cut two pieces of canvas out in the same shape. It is better to use interfacing for pockets but as I am adding hand embroidery, I need something stronger to back it. I will cut away the seam allowance in order to stop the seams being thick.
3.) I then tacked the real fabric to the canvas. (Right side on top)
4.) I then began sewing the embroidery. I will match the style to each half of the jacket.
5.) I then took out the basting stitch and cut the seam allowance away from the canvas.
6.) I then sewed the embroidered fabric to the same shape inside out, turned it through and pressed it flat (Without pressing the embroidery). Here I have just pinned the pocket above the welt pocket to see what it will look like.
7.) I took a photo further away to see the overall affect. I actually think the pocket flaps are too small in relation to the rest of the jacket. So I wanted to change then (Without re doing the embroidery!).
8.) I therefore cut the embroidery and hand sewed it on to a larger pocket flap. (This isn't really the best thing to do, but I wanted it to be bigger - but didn't have time to redo the embroidery!) I then hand sewed my lace on. As you can see the edge of the embroidery piece is still visible. I therefore added more of the decorative lace to cover this (Below).
9.) I then added a curve to the lace. (Obviously not sewn through all layers of fabric)
Final fitting!
1.) I forgot to take photo of my vents as I went along which is annoying if you're doing vents! Sorry. But here is a photo of the inside of my side vents. These get sewn together but aren't pressed flat on the outside like the middle vent. It has a nice curve to it which can be seen in the photos below.
2.) I then used a herringbone stitch to keep the piping at the bottom of the jacket up, and cut down the calico on the inside to reduce the bulk.
3.) Now that the shoulder pads are in, the jacket fits well. I check that the piping on the tails matched up at each vent.
4.) Close up of the vents. The middle one is pressed flat, the others not.
5.) I then positioned the turn up to line meet the bottom of the waistcoat. I will use a button to hold it in place.
6.) From the front! You can slightly see the lining of the jacket at the front. You would usually have a facing but I didn't want one as it would be seen in the turn up at the bottom. When the sleeve lining is in however, you wont see this this lining. I just have the hem to sew up, the sleeve lining to do, and the buttons to put on! I don't have anymore images for the time being...as deadline is tomorrow and I'm off to print my blog! :O


